

Have you ever seen a beautiful charcuterie board and wondered how to make your own? Maybe you saw one on Pinterest or enjoyed one at your favorite restaurant, all the while wishing you could have cheese and charcuterie at home. You absolutely can and the great thing is that you have a few options.
Where Do I Start?
First, you need to decide if you want to shop for all of your own ingredients and then build your own charcuterie board or order one that’s ready to go. At CheeseBoarder, we offer specially curated gourmet DIY or ready-to-serve cheese and charcuterie boards delivered right to your door by GoldBelly.
If you said you want to build your own, then we’ve included some simple steps to take you from shopping to board completion. But don’t go away if you’re looking for a faster and easier option because we have something for you, too!
Step 1: Choose a Wooden Board or Serving Platter
Pick a sturdy yet beautiful board, serving platter or plate that you feel is large enough to accommodate your food choices and that also suits your style. Any material will work especially if it’s reusable and something that you already have on hand. A rectangle shaped tray or board usually fits charcuterie and tiny cups or serving bowls the best but the shape you use is up to you. There is no wrong answer here as long as your platter isn’t overcrowded.
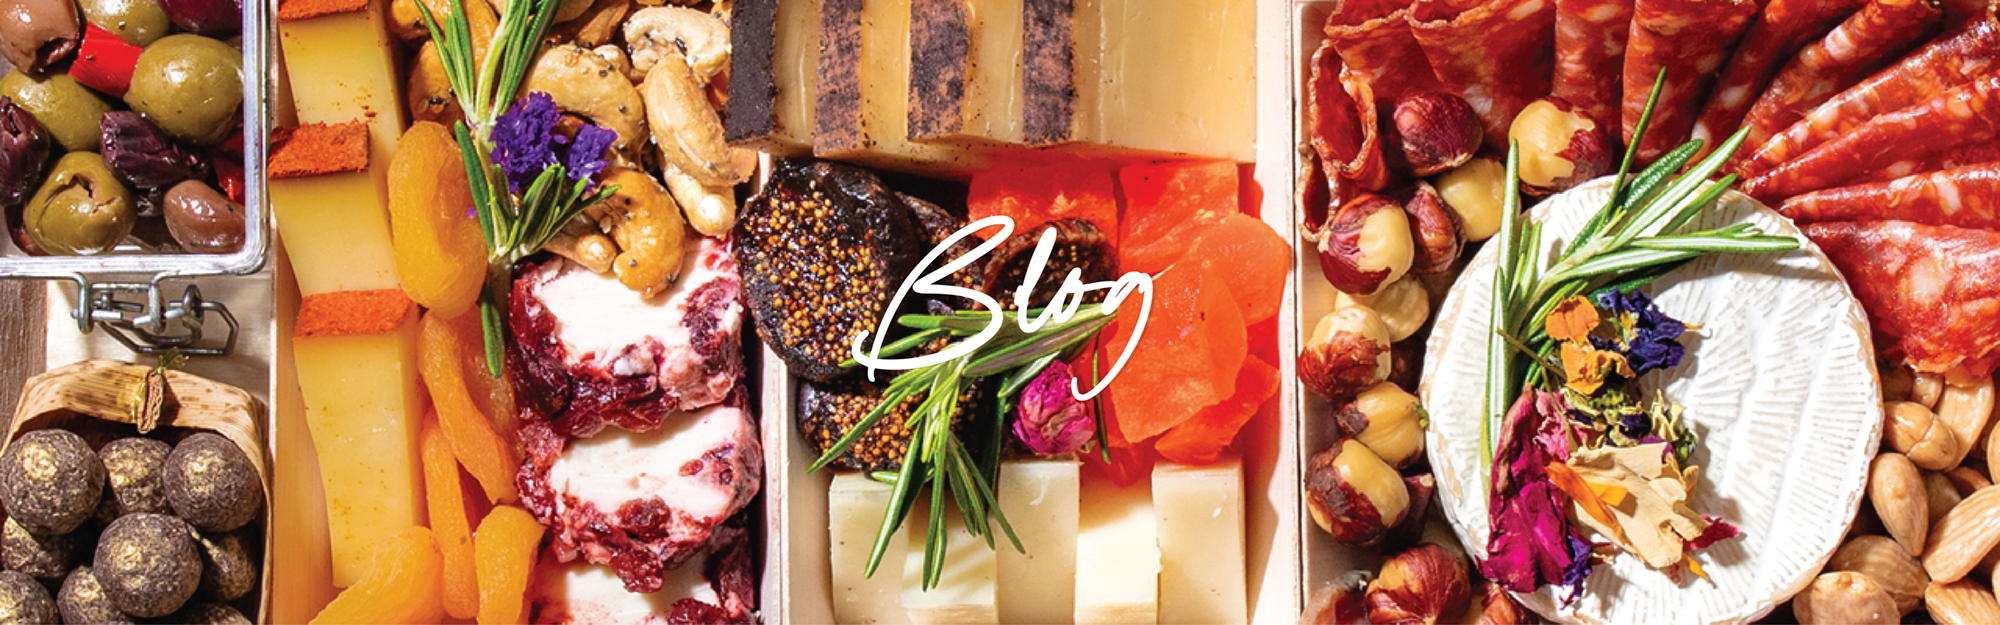
Step 2: Select the Cheese
The unspoken charcuterie board rule is to include three to five cheeses making sure to offer a variety of hard, soft and blue cheeses. If you have the choice between the grocery store cheese and farmer’s market cheese, buy the locally made, high-quality options. If you aren’t sure what cheese to buy, ask the salesperson for pairing recommendations.
Step 3: Choose the Meats
Select a few varieties of thinly sliced cured meats such as pancetta, salami, prosciutto and sopressata. To make them easy to grab, lay them flat or arrange them loosely rolled. You may even consider including spreadable meats like chicken or duck liver pâté. Try to offer a few meats that people are familiar with and an unique option or two.
Step 4: Pick Your Condiments
You’ll want to include some starch in the form of crackers, breadsticks or bread especially if your board has spreadable meats, cheeses or jams. Along with your meat and cheese selections, you can add fresh and dried fruits, veggies, herbs, jams and jellies. Farm fresh is best but if that isn’t practical for you, store bought is just fine.
Step 4: Carefully Arrange Your Grazing Board for Two
To build your masterpiece, start by putting the small containers of dips, spreads and small foods like olives or nuts on the tray. Then arrange your meats and cheeses evenly around the board without overcrowding. Next, add your crackers or bread slices between the foods. Let them fall over, they don’t need to be stacked or lined up perfectly. Lastly, fill in the empty spaces with whatever is left: fruits, veggies, herbs and more. Add a few cheese knives and your board is complete!
Time-Saving Charcuterie and Cheese Board Options
Short on time? If shopping for a long list of products and building your own platter has you feeling anxious or stressed out, don’t worry! CheeseBoarder offers a wide selection of stunningly arranged ready-to-serve gourmet charcuterie and cheese boards including vegan and vegetarian options. We also have many board options for gatherings with a larger guest list. Simply order one or more online and have it shipped to you anywhere in the US.
For those of you who are just feeling a tad adventurous, we have DIY charcuterie boards. These also include the artisanal meats and cheeses that we are known for that you can arrange yourself. No matter which CheeseBoarder product you choose, we know you’ll love our high-quality meats and cheeses that are packaged fresh and ready to enjoy with your loved one.